Silkscreens can be purchased from suppliers, or with rudimentary carpentry skills, made from scratch. The standard T-shirt screen is usually about 20" X 20", measured inside. A good rule of thumb is that this dimension should be 5" bigger than the image on the screen to allow space for ink to sit on, and to allow for a kind of hinge action between the image and the frame. 2" X 2" lumber is good for this size frame. It's important that it's straight, without
big knots. Staples usually won't go into knots--it's hard to staple into dry douglas fir
as well, but pine or redwood are easy to staple and lightweight: screens made from
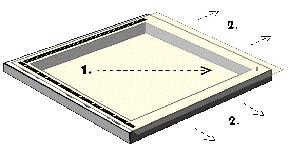
these types of wood are easier to handle. It's important for the frame to be flat. When fastening corners go around a couple of times the way you tighten the nuts on a car wheel or cylinder head, checking for flatness as you go by sighting along the edges. Here's a product endorsement: "Liquid Nails". In addition to locking the corners of screen frames together it also bonds fabric to wood at least as well as the superglue gel used by the industry, and it's cheaper (but hard to work with--dry, it's almost impossible to get off your hands, but then so is superglue). The following geometry for fastening down fabric comes from the book I consider the standard work on screenprinting apparatus: "57 HOW-TO-DO-IT-CHARTS" It's a trade publication from the 1930's with wonderful ink drawings, available as
a reprint from: ST Publications, Cincinnati, Ohio.
Tack the fabric down on two adjacent bars, first from corner to corner--stretching it
slightly along the bar then filling in with staples. I staple through a strip of nylon tape
after first coating the wood, fabric and underside of the tape with Liquid Nails, then
hammer the staples down. The result invariably looks messy but if you do it right the
fabric will never move (you can carve dried-up liquid nails off your staple gun with a
utility knife). Let the glue dry a bit before stretching. Next tack diagonally across, then
fill in--this is the part that's hard to glue. Tape is one of the essentials of screenprinting: in addition to covering holes and stopping leaks it can even be used to create rudimentary stencils. I like the clear 3" packing variety for waterbase-- the solvent-base industry seems to favor masking tape, however it gets soggy in water. I try to have some of the expensive kind available for working out in the middle of the screen because it doesn't leave a glue residue.
Narrow clear tape is good to have on hand for making straight lines with blockout (a liquid medium that dries in the mesh, also useful for making stencils as well as filling random open spots: lacquer for waterbase inks, waterbase for solvent inks). Rounding out this short list of screen prep essentials is the trowel-type palette knife, which is used like a minature squeegee to manage practically any semi-liquid medium on the surface of a screen: blockout, photo emulsion or color. A large version of this exquisitely useful implement is the icing spatula.
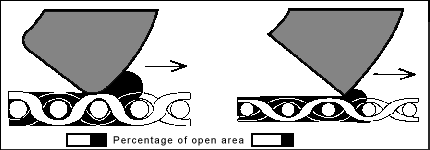
It's fairly easy to make your own screens if you have basic carpentry tools and skills, but the other essential, squeegees, have to be purchased (although I've heard that a usable squeegee blade can be somehow cut from an auto tire). Blades come in a variety of hardnesses (durometers) and cross-sectional shapes. Waterbase fabric colors need a relatively soft, rounded edge, in order to push a lot of ink through the screen--the perfect roundness seems to come with a few years wear on a rubber blade (my years-old plastic blades show hardly any wear). A sharp blade will give the same deposit with more pull which translates into more control, and also more time spent on each print.
|


